Import of GPS data (points) into ArcView 3.2.a
Source Data from the GPS device
* UTM coordinates: Zone 30 / Date: Ordnance Survey of Great Britain
'36 / Units: meters
Reprojecting Data ( leave out, if not necessary )
I used ENVI "Map Coordinate Converter" for the reprojection
* Transverse Mercator map projection: United Kingdom / Date:
Ordnance Survey of Great Britain '36 / Units: meters
Creating the dataset
- open your favorit spreadsheet program (e.g. Gnumeric, Star Office,
MS EXCEL)
- create a file, similar to this:
Sheet1
| id |
description |
GPS_x |
GPS_y |
|
|
| T1 |
u/s of N-Y-F |
267009 |
196614 |
|
|
| T2 |
At mouth of N-Y-F |
267000 |
196592 |
|
|
| T3 |
d/s of N-Y-F |
266985 |
196585 |
|
|
| T4 |
Culvert @ Macro |
266748 |
196305 |
|
|
| T5 |
Morfa Stadium |
266504 |
196021 |
|
|
| T6 |
Wooden bridge |
266408 |
195417 |
|
|
| T7 |
U/s of White Rock |
266360 |
195036 |
|
|
id and description are nice, but not essential
!IMPORTANT!: Don't use commata at all!
Use points (instead) to express non integer values.
- save this file as "comma delimited textfile" under e.g. "gps.txt"
the output file should look like this:
id,description,GPS_x,GPS_y
T1,"u/s of N-Y-F",267009,196614
T2,"At mouth of N-Y-F",267000,196592
T3,"d/s of N-Y-F",266985,196585
T4,"Culvert @ Macro",266748,196305
T5,"Morfa Stadium",266504,196021
T6,"Wooden bridge",266408,195417
T7,"U/s of White Rock",266360,19503
Importing the dataset into ArcView
- start ArcView
- create a new view in ArcView
- add a table [Project -> Add Table]
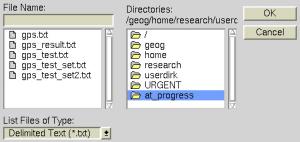
look for "Delimited Text" files in your directory and open the created dataset
(e.g. gps.txt)
{
if the import doesn't work and you receive an error message in ArcView,
look for trailing commas or other
disturbing stuff inside your dataset (textfile gps.txt
)
}
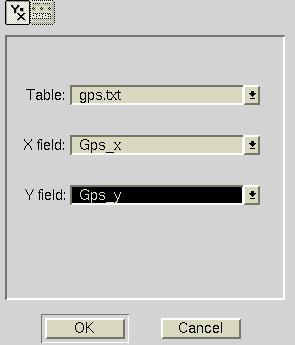
- Activate (click into) the empty "View" and choose "View -> Add
Event Theme" from the menue bar
- Choose tablename, x and y coordinates according to the columns in the
table:
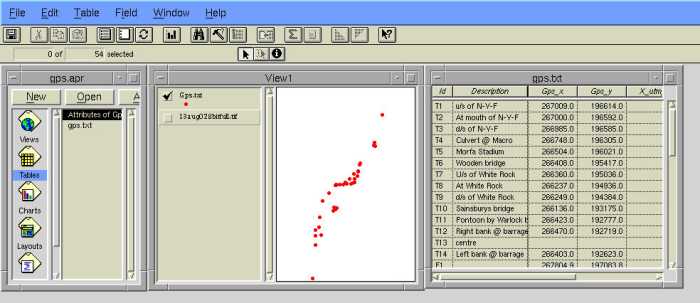
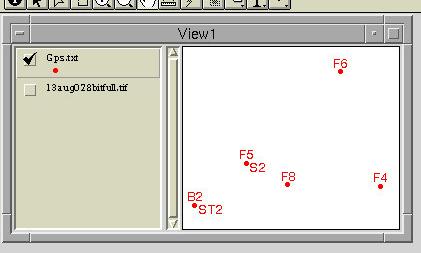
- Activate the created Event Theme by ticking the box in front; your
ArcView screen should now look like this
- If you have additional information about some or each point ( e.g.
id, description )
you may want to display these values as a label, next to each point:
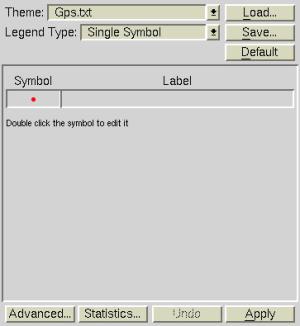
- activate the view window; choose THEME -> EDIT LEGEND
- Double click on the Symbol in the Legend Editor:
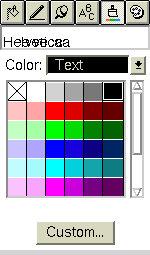
- Choose Color, Fontstyle and Fontsize for your Label from the
Palette Manager:
- Click Apply in the Legend Editor to accept the changes
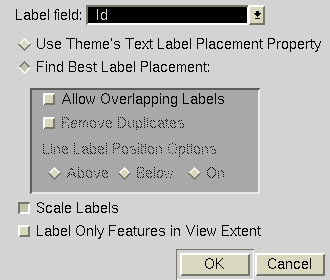
- Open THEME -> Auto-label from the main menue
- Choose which table column hosts the label, that you like to display
and choose "Find Best Label Placement" to make sure the Labels don't
overlapp
- Click OK and your labels schould appear, right next to GPS
points
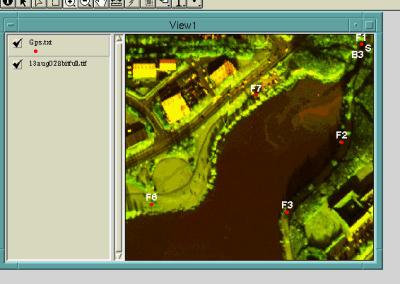
Together with a CASI image as background it looks like: